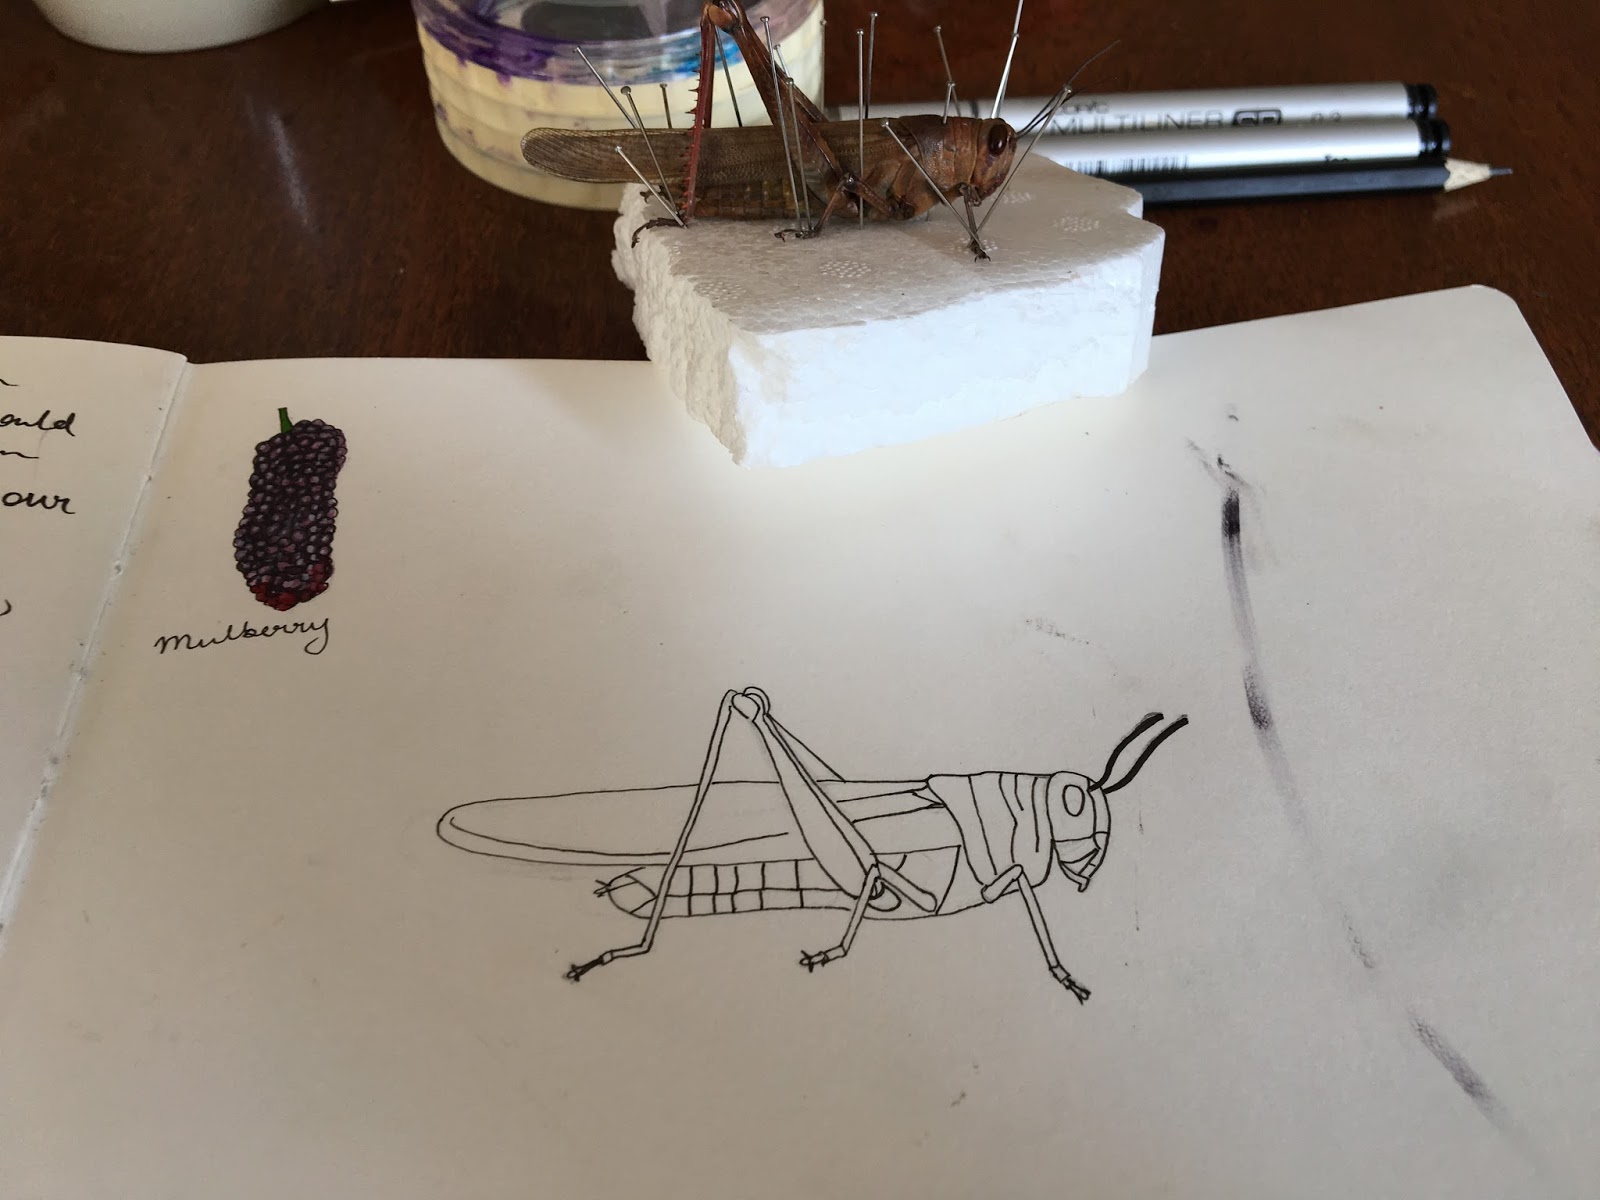
1. Grasshopper caught in the garden, 2. Pinned to dry in position, 3. Our collection so far, 4. Drawing over my pencil sketch with black Coptic markers, 5. The finished watercolour in my Nature Journal.
I have always enjoyed looking at the pinned insects at museums and the beautifully framed insect collections you sometimes see. It seemed like a difficult and highly skilled craft that was in the distant realm of scientists. It hadn't occurred to me that my children and I could actually do it ourselves with a few simple household items!
There are so many great reasons to start a collection for yourself, or with your children. A whole new world opens up to you when you start observing the insect kingdom and learn to identify specimens. Closely observing insects that we see every day has greatly increased our appreciation for them. Nurturing a love of nature in our children is so important, for we will leave this world in their hands, and you won't save what you don't love. It is also possible we could discover a new insect or our collection could end up in a museum, adding our contribution to the history of science. Our collection is also a time capsule of insects in our region right now.
I am no expert, but I do feel like if we can do it, anyone can do it. We started with just the things we had around the house, reading online and watching Youtube videos, before buying a
Beginners Kit as our interest increased. So, this is how we have done it!
What you need:
Old glass jars - to catch and kill specimens
Pins - to pin and hold insects in position while they dry
Styrophone - to pin the insects on to
Nail Polish Remover - the vapours kill the insects
Freezer - pop the insect in a jar in the freezer for a couple of days to put it to sleep for good
Where to find insects:
When you start looking you will notice them everywhere! Particularly in the warmer months. We started by finding insects in our own backyard. Looking on trees, under rocks and logs, around the outdoors light at night. Then we took our butterfly net out with us and caught our first butterfly! Friends have given us dead bugs they have found too. You can even keep your own insects as pets and pin them when they die naturally, silkworm. You can also look up ways to make traps, or place a white sheet under a tree or bush and shake it and see what lands on the fabric.
How to kill them:
This may cause conflict for some people, but generally, you will have to kill insects to create a collection. You can create a killing jar with a cotton bud or tissue soaked in nail polish remover with a piece of cardboard the shape of the jar over the top. The vapours will kill the insect without damaging it, except for moths and butterflies, which will damage the scales on their wings by flying around in the jar. For moths and butterflies I have learnt to squeeze their abdomen hard enough to immobilise them but not damage them, then pop them in the freezer to put them to sleep. I prefer the freezer method over the killing jar method when we are close to home. But in the field, you may need a killing jar.
Pinning:
When insects haven't been dead for too long, or have been removed from the freezer and allowed to thaw, this is the best time to pin them. There are special long thin pins used to pin insects, but you can start by using dressmaking pins. Insects are usually pinned to the right of their thorax, leaving enough room above the insect to be able to pick up the pin again. (1/4 inch) When insects dry out they may curl up, which is why it is useful to hold their parts in place while they dry and harden. Place the pinned insect on the styrofoam and use more pins to hold the legs and antennae into natural looking positions, without actually pinning through any of the body parts. Broken off pieces can be glued back on.You can also spread out one or both wings at 45 degrees and hold them in place by pinning down strips of baking paper either side of the wing so as not to damage it. You can make or buy a setting board to do this so that the insect body sits in a groove and the wings can lay straight out. Leave the specimens to dry completely before removing all the pins and adding your insect to your collection.
Relaxing:
If you find a dead insect that has gone hard, you can relax it again by putting water and nail polish remover on cotton balls covered with a piece of cardboard in a sealed jar. The acetone stops the insect from going mouldy - we found this out the hard way... Once relaxed you can pin it as before.
Storage:
We have a student box that comes with a fitted foam insert, a little box with a metal mesh in it to keep mothballs so that ants and other insects don't destroy our collection. But you can also use framed shadow boxes or speciality display boxes to store and display your collection. Anything with a lid to keep other insects out!
Labeling:
Labels contain four pieces of information - the longitude and latitude of the find, the location name of the find, the date and the initials and surname of the person who found it. I use google maps and Latlong.net to find the coordinates of our discoveries.
You can then use field guides, facebook insect identification pages, local museums etc to identify your insects. You can study their life cycles and observe and draw them. Once you get started the questions you raise will lead you to the next part of your journey, but if you have any other questions on getting started I am happy to help!